Wednesday, February 29, 2012

Test Garage


Just as it says... Test


But I'm liking it. Almost finished.


Tuesday, February 28, 2012

RC Chassis Art


Sometimes in RC there's more to see under the shell than on top. Let's take a look.


On my adventures at D-link I found these two RED beasts. One shaft drive and one belt drive by the same owner.


RE-Xtreme samurai spec machines are similar colors, so it's a good feature for me.


If you want the best at any cost, then you end up with something like this. RC-ART CE-RX White wolf that's no longer white.


Some beautiful Overdose components finishing off  an already good chassis. But look closely, all pulleys have been changed along with many components.


Keyence motor wears the TF jacket and everything including turnbuckles have been done in RED. Lower suspension arms are also alloy and anodised.


I'm only wondering, why no red anodized wheels? Custom Steering angle on this chassis too.


The second chassis is the famous OTA-Zeon shaft drive with similar tuning.


To make two like this you are looking at about $1500 to $1700 EACH with transmitter such as an MT-4 to share with both. You are looking at $4500 in RC goods including twin RED anodized muchmore chargers and carbon covered li-po batteries.

Base chassis $500~$700 depending on model. Extra component installation and complete color matching can be around $200~$500 dollars.

Full custom color change anodizing around $150 depending on number of components.

Keyence Motor packages around $500 with Matching TF Jacket.and closely matched ESC.

If you want the best. Remember those numbers in your mind. RE-Xtreme RC can supply things like this direct from Japan, THE REAL JDM RC. It takes a little time and money, but dreams can come true.


Kazama D-Link II Moriya


Today's adventure in Kazama D-Link II Moriya. High Speed drift track and Low Speed street course.


Took the RWB DRB and the XX TA-06 today for some D-Link action at Kazama's awesome venue.


Kazama's course is HUGE! There's so much space sometimes you don't know what to do.


Here's the view from the flag tower down the "straight" which, of course, you never actually drive straight.


You need some gearing changes here. oops  just noticed the body is Popped at the rear. haha.


This is the Pit/Entrance. the anti-clockwise direction allows a big high speed sideways flick as the car passes your feet. pretty cool. the straight is the tricky part. I'm glad Kazama-san changed the layout because before the main straight was on the far side and it was impossible to judge distance to the wall. This way it's MUCH better!!! I liked it.


My Yokomo DRB with RWB FD Porsche got a lot of use today. The chassis is PERFECT!  A larger track shows off a bad setting much more than a small circuit. I couldn't get the TA-06 with XX dialed in exactly today, too much rear rotation, but anyway, I still used it and had fun for 4 hours.


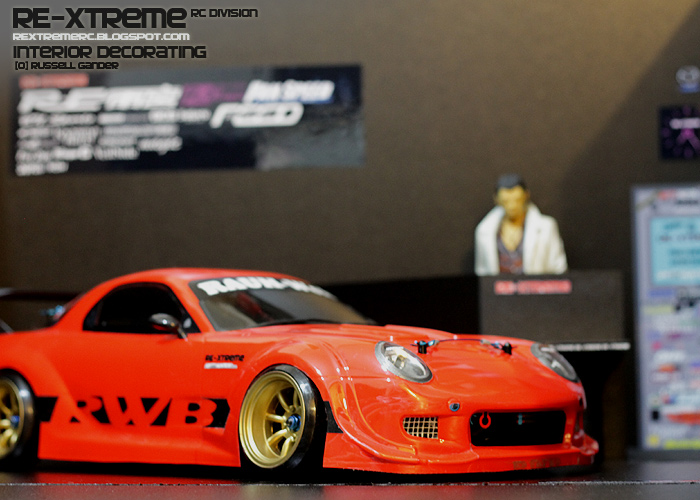
I swapped the carpet tyres to the Work Miesters. This is how RWB should roll! Rear height just a bit high, but under power it's good. I really need a diffuser for this. I think Street Jam are sold out of rear diffusers all over Japan.


BUT... here's the thing with a big track like this. There are so many different lines you can take on one corner.  In scale terms the width of the track would be about 8-10 car widths wide with so much run off.

It allows for sloppy driving. In the beginning I had every apex sorted, my mindset was perfect. But after driving with a few locals, I got all confused to which line was right? So I got sloppy, If you miss an apex you don't hit anything either. Any line was ok, I couldn't understand why they were using a particular line which to me seemed wrong.


The main straight was the only place I really made mistakes, but it's a small margin for error, It's also the only place with no runoff. you make a mistake at high speed and you are into the barrier. Not so good but it forces you to concentrate.

Compare this to Max One for example where there is One Line and One Line only, which makes for easy understanding and good battle action. Something a "few targets painted on the course might fix."


Anyway, a lot of courses have been upgraded to carpet recently. not too many more asphalt tracks left.
rain is not a problem.


Look in the display case for awesomeness.


Anyway, let's look at the new course. Before this was a small test course, but now it's polished linolium / concrete? I don't know what it is, but carpet tyres have very little success on here. I was using literally 5% throttle. Super slippery low speed action.


The DRB is super light at the moment which means no traction on a course like this. The TA-06 fared better with heavy NiMh packs to add weight and traction, but I didn't spend long on here even though I wanted to.


Because it looks great!


I think it's the colour and look of the fake asphalt that makes it so good. When the cars are sideways down the short straight it's awesome.


As a diorama course I'd say it's kind of half finished. I hope Kazama paints these buildings to add that touch more realism. Check my rear tyre contact patch... no wonder no grip!


It has the makings to be a nice little track and a very big change of pace. It was actually a good place to come when your batteries get to that point where the big track is difficult, but you want to finish off the pack.


I handed my car over to another driver for the above shots, so I took some of his JZX bodied RE-R in return.


I don't know what it is with Japan and Drift in general, but it seems there are only 2 bodies you should ever run. Nissan S-chassis and JZX of some kind. I guess it's understandable where I run, because Kazama is a JZX 110 and S15 man and WELD run the JZX 100 and you may remember their crazy chop top S15.


In any case, it was a good day at Kazama D-Link II Moriya and it confirmed a few things for me.

I want to replace my TA-06 with another DRB in Red.

Monday, February 27, 2012

Keyence TAO to Tachyon ESC Setting


I love my Keyence ESC. It gives fantastic control and it NEVER EVER gets hot.


Because it's a Japanese Market Product the usage is straight forward, simply connect to the ESC and update.


But there's one thing that catches many every-time. Data Link .... FAIL! The English User manual for changing to Setting Mode on the Tachyon ESC is a little vague.


Turn it on,  Press the ESC Button for 4 seconds until the lights change on the ESC. This will switch between RUN Mode and SETTING mode. While in SETTING mode the car will not run and you can change settings on the ESC itself with the buttons but TAO is much easier.

After Data Link updating is complete on the ESC, simply turn off the Tachyon ESC. Settings should be saved.

If you turn it on again and the car does not respond. You are probably still in SETTING mode so hold the button for 4 seconds to swap back to RUN mode.


Lets look at the TAO itself.

Set mode can be done anytime and does not need to be connected to the ESC. I'm only doing it here, because I didn't charge the TAO, it's running from the rc battery.


 Simply adjust what you need and press save.


When you are ready, connect it all to the ESC with the receiver plug. Make sure you are in SETTING mode.

Then start the Data Link.


Select which one you want to use. There are 3 user settings you can adjust.


Press enter to send it to the Tachyon ESC. (note ESC is not in SETTING mode in this picture. ESC lights are different.)


So you will get the Link fail. (only for demonstration)


Change the mode to SETTING mode.

This is the desired result.


You can also Preview what settings you have on the ESC before you data link update or Review them after you data link update.

You can also press SAVE directly from Preview mode to adjust settings directly on the ESC.

Must be in SETTING mode only. It will perform a reverse Data Link also.

Happy Updating.

Russ.

Famous?

Keyence Site.

http://hobby.keyence.co.jp/rcw/pdf/2012_03.pdf

check the background.... ME desu!

Sunday, February 26, 2012

RE-TA-06 Tsunami Spec - Phase 1 Complete


I think I'm 99% ready to sign off on Phase 1.

FOR SALE. 53000Yen!

I'm only asking what it cost me in parts. 
(chassis only!) 
(NO Motor, ESC, Servo or Receiver, Original TA-06 wheels and tyres and original chassis parts supplied.) 


Spec Sheet

Tamiya TA-06 Pro kit Tamiya
Bearings TRF
Turnbuckles TRF
Shock Upgrade TRF
Front Castor Hub Carrier Set 8 deg  OVERDOSE
Steering Upgrade OVERDOSE
Axle Set Front One Way Eagle Racing
Axle Set Rear Rigid Axle Set OVERDOSE
CS Centre Pulley 20T Square
CS Front Pulley 15T Square
CS Rear Pulley 16T Tamiya
CS Pulley Shaft Tamiya
CS Pulley Belt 57T Square
CS Pulley Mount Eagle Racing
CS Pulley Tensioner Square
Shock Rebound Pistons Active Hobby
Shock Long Spring Seats Overdose
Springs 29mm Kazama
Front turnbuckles Team Bomber
Hub retainers Tamiya
Steering Turnbuckle Yokomo
Shock Oil 300 Yokomo
Battery Release Conversion Square
Hex Screw Set Kawada
Rear Shock Tower Tamiya
Steering Turnbuckle Yokomo


Balance is good.


CS Gearing is good.


I've installed a 86T spur for a test this week. I'm ready to sample final gearing for a different track. These ball end screws are just for looks. I got sick of the stupid screws in the "Pro" kit and these were an interesting alternative without spending 2000 yen for a cover.


The TA-06 so called "PRO" kit is far from it. I've replaced a lot of items on this chassis. I had to get some hub clamps which in my opinion should be included.


And the suspension alignment is done with plastic items. These would be the only remaining item I'd like to change. They should be ashamed to call this a "PRO" kit. I modified the rear shock tower with a customised, VDF item installed for body mount preference.

It's for sale as I'm only going to run the DRB from now on. Let me know if you're interested. It's very nice machine.